Brun Ko Farm
  • Home
    • About
    • Contact
  • Blog
  • Products
    • Chicken
    • Eggs
    • Lamb
    • Vegetables
    • Honey
    • Operation: Lawn to Lunch
  • Newsletter

Shepherd's Pie

1/12/2018

2 Comments

Print Friendly and PDFPrint Friendly
 
Ingredients
  • 1lb stew meat (or hamburger for a *speedy version!)
  • 2 cups beef broth
  • 2 Tbsp flour
  • 4 or 5 medium to large carrots
  • 1 cup of peas
  • 3 cups of mashed potatoes
  • Butter, optional
  • Rosemary, thyme, garlic, and salt to taste

Directions
Cook stew meat, carrots, and broth in crockpot on low for 6-7 hours. Preheat oven to 375F. Spoon meat and carrots into a deep dish pie plate. Add peas (frozen or fresh). Sprinkle with rosemary, thyme, garlic, and salt to taste. Add flour to juices in the crockpot, whisk together and pour over top of meat and vegetables. Spread mashed potatoes over top of everything. Bake for 20 minutes. Remove from oven and dot top of potatoes with pats of butter (optional).

*If you are using hamburger, simply brown the hamburger in a skillet and add broth and carrots and simmer until soft. Add hamburger and carrots to pie plate and then continue with the recipe as written.

Enjoy!
​Brun Ko Farm


2 Comments

Philly Cheese Steak Hoagies

1/2/2018

0 Comments

Print Friendly and PDFPrint Friendly
 
Ingredients
1 lb stew meat
2 green peppers
1 small onion
1 cup of beef broth or water
​1 package of hoagie or brat buns
6 slices of provolone cheese


Directions

Slice onion and green peppers into long thing strips. Combine stew meat, broth, onions and green peppers in the crockpot and cook on low for 8 hours. Use a slotted spoon to transfer mixture to hoagie buns and top with a slice of provolone cheese. Do this while the meat is still warm to allow the cheese to melt just slightly. Use remaining liquid as an au jus dipping sauce if desired. 

​Serves: 6

Picture
0 Comments

Breakfast Burritos

9/3/2016

0 Comments

Print Friendly and PDFPrint Friendly
 
Picture
Wow, the summer has really flown by! We accomplished a lot and learned a even more! I think that I speak for NP and myself when I say that our biggest regret was not taking a little more time for ourselves amidst the myriad of responsibilities.  I for one am feeling just a little bit burned out right now. However, after some R&R, I will be ready to hit it hard again!

While summer is not over, it is certainly winding down. For me at least, the Local Food & Farm Celebration farm crawl that we co-hosted along with Rolling Acres Farm & Harrisdale Farmstead, felt like a culmination of the season.  With that event being over and calves being weaned this week, we have had a little more time for ourselves and are starting to transfer some of our energy to other things that are important to us. Like relaxing, spending time with family, and preserving food for winter.

Currently, we have 7 quarts of green beans in the pantry and roughly 10 quarts of broccoli in the freezer. This weekend, I hope to get rolling on applesauce and I can’t wait to try out my Christmas present (outdoor wood cook stove – more on that another day) while making tomato sauce.  Another thing we did this past week was re-stock NP’s supply of breakfast burritos – I think the poor guy has had to forage for breakfast for at least a month! And I mean that with all sincerity. Meals have been lacking around here this month – not because we don’t have food (we have piles of it!) but because I have been lacking in imagination (and time) which results in not very appetizing meals. We have had A LOT of hot dogs, hamburgers and lunch meat sandwiches served with things like a can of beans or the 6lbs of potato salad that we’ve eaten for every meal for a whole week … But things are turning around. I know this because as I am writing this it is noon and I am already daydreaming about what we will have for supper!
​
 But, without further ado, make-ahead breakfast burritos are what this post is all about! Keep in mind that this is how we make them but the recipe can easily be adapted to fit your likes and preferences. That’s the great thing about cooking at home!! You can make whatever you want, any way that you want, with just the right amount of the ingredients that you like while leaving out the ones you don’t, aaaand you can cook it exactly how much of it you want, when you want it!

Picture
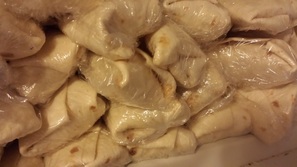
That’s it! You should end up with 35-40 burritos. Pop them in the freezer and the next time you need breakfast just pull a burrito out of the freezer, wrap it – plastic and all – in a paper towel and microwave for 30 seconds on each side.  Remove paper towel and plastic wrapper and voila! A hot and fast but still homemade breakfast!
 
The best part about it? You can personalize your burritos any way you want! Don’t like hot sauce? Use salsa! Too many potatoes? Try substituting beans instead. Don’t like eggs? Use a bit more sausage and add some sautéed onions & green peppers. The possibilities are endless!


Enjoy!
Brun Ko Farm
0 Comments

Pumpkin puree? No way!

12/7/2015

0 Comments

Print Friendly and PDFPrint Friendly
 
Pumpkin pie, pumpkin bread, and pumpkin bars are commonly enjoyed at Thanksgiving meals, Christmas meals and throughout Fall and the holiday season.  We grow an abundance of pumpkins in Iowa and we snatch them up as decoration and a carving medium but how many of us have actually made a pumpkin pie from scratch using a real  pumpkin?? I’ll be honest, I have not. But after today’s adventures, that’s exactly how my pies will be made in the future! It turns out it’s really quite easy! 

Now, I don’t have any pie pumpkins on hand, so I used butternut squash and used the puree to make  butternut squash bread, but the process is the exact same! 

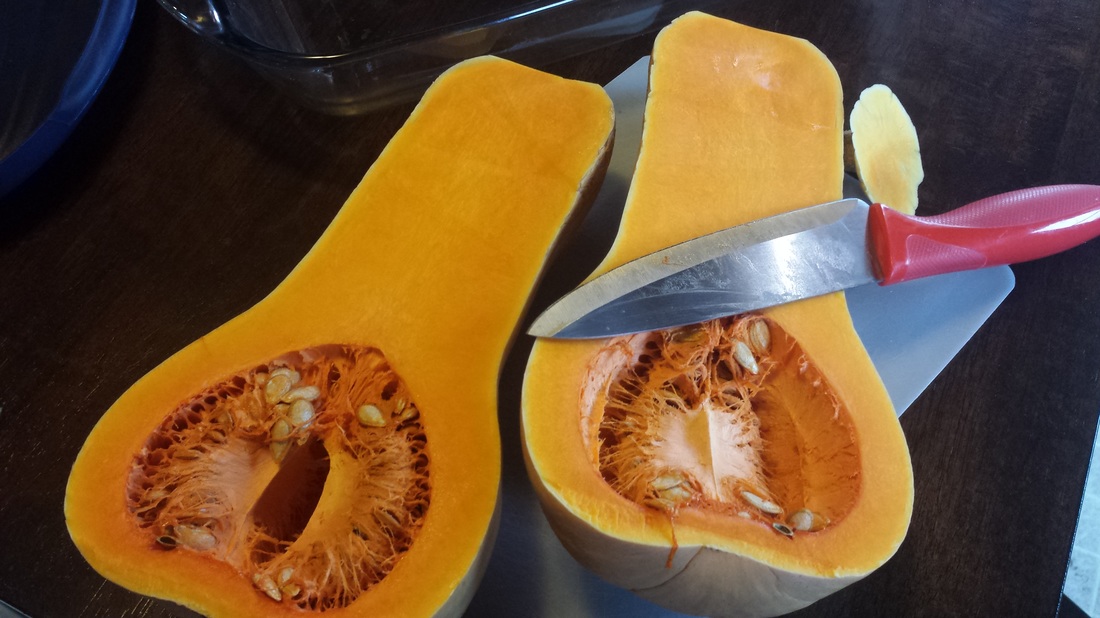
​To start, trim the top off of your squash (or pumpkin) and cut the squash in half lengthwise like this.

Picture
This beautiful squash was grown by my father-in-law just down the road from us!
Then scoop the seeds and ‘guts’ out and turn the squash upside down in a cooking pan. Add an inch or 2 of water to the pan and preheat your oven to 350 degrees Fahrenheit.
Make sure to get all of the stringy bits in addition to the seeds!
Generally, your squash should be nice and smooth. This one is a bit wrinkly as it has been in storage for a while.
Bake your squash at 350 for 30-60 minutes. Baking time depends some on the size of the squash so I recommend you start checking it after a half hour. The squash (or pumpkin) is done when you can easily pierce the skin with a fork.

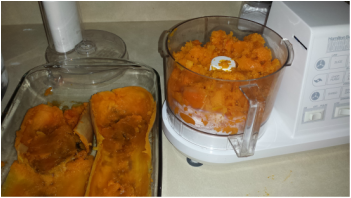
Once your squash is done cooking allow it to cool enough to handle and then scoop the meat of the squash out of the skin and into a food processor.
Picture

Picture
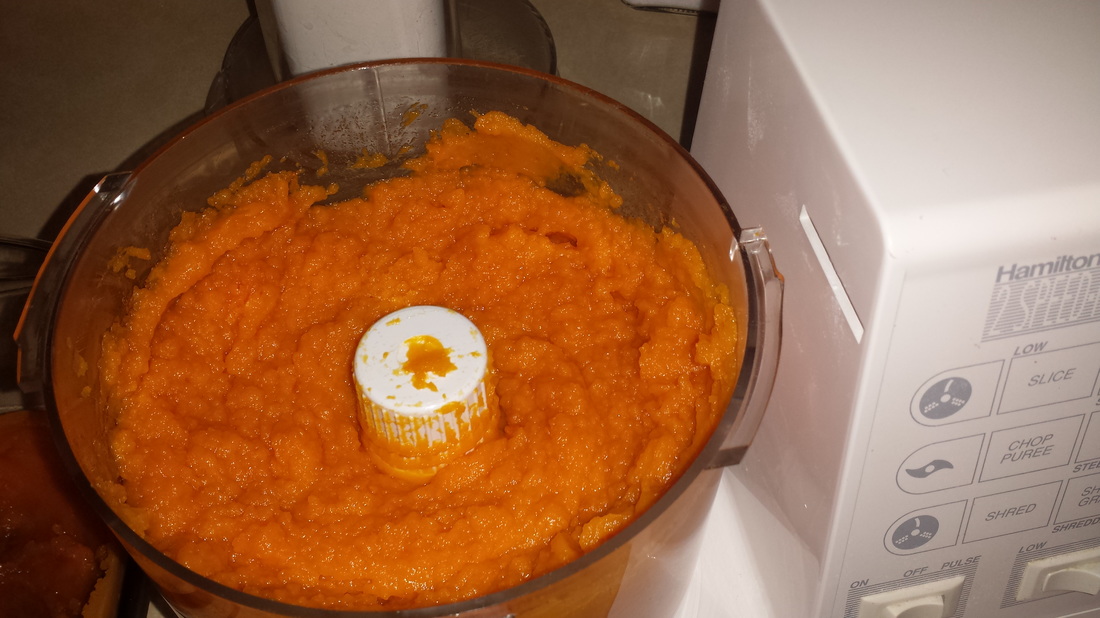
Puree the squash until it has a nice smooth consistency.  This should only take a minute or two. 

Now, it is ready to use in your favorite recipe or be frozen for later use!  I used mine to make Butternut Squash Bread from my Taste of Home cookbook. It was a new recipe for me but I am really pleased with how it turned out! It's super moist and has a pretty color. NP says it tastes like squash but I don't think so!
Butternut Squash Bread
Recipe from: Taste of Home

Ingredients:
2 packages active dry yeast
1/2 cup warm water (110 - 115 degrees Fahrenheit)
1 1/4 cup pureed butternut squash
1 cup warm milk (110 - 115 degrees Fahrenheit)
2 eggs
1/3 cup sugar
1/3 cup butter, melted
1 tsp salt
7 to 7 1/2 cups all purpose flour

Directions:
Dissolve yeast in warm water. Add squash, milk, eggs, sugar, butter and salt; beat well. Gradually add 3 1/2 cups flour, beating until a soft dough forms. Knead dough for 6-8 minutes, until smooth and elastic. Cover and let rise until doubled. About 1 hour. Punch dough down, divide into thirds and shape each portion into a loaf. Place in greased loaf pans and let rise until doubled. About 30 minutes. Bake at 375 degrees Fahrenheit for 25-30 minutes or until golden brown. Remove from pans and to wire racks to cool.

​When it comes to pureeing my own pumpkin, the other thing that has always kept me away is the sheer size of most pumpkins! However, I learned that most varieties of pumpkins intended for making pies are much smaller than your standard carving pumpkin!

Pie pumpkins are also called sugar pumpkins and have a meatier, smoother, sweeter flesh than your typical carving pumpkin. Sometimes you can find them at groceries stores and farmers markets. This time of year look for indoor winter markets like the one that will take place in Harlan on Dec. 22.  I can’t guarantee that they will have pie pumpkins but they did at the Thanksgiving Market in November!

*NOTE: Butternut squash is also considered an excellent substitute for pumpkin, so if you can’t find a pie pumpkin give butternut squash a try!

Now it's your turn! How have you/will you use your very own pumpkin puree??

Enjoy!
Brun Ko Farm
0 Comments

Cream Cheese Chicken Poppers

10/4/2015

0 Comments

Print Friendly and PDFPrint Friendly
 
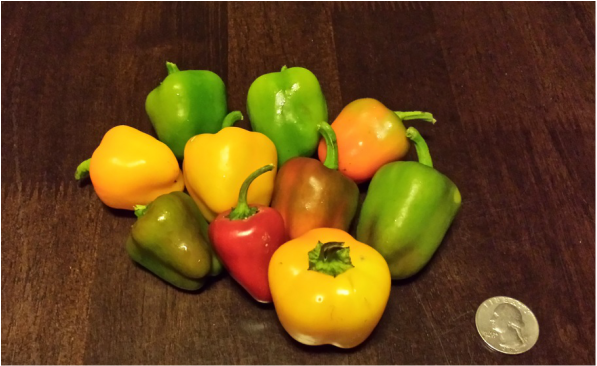
​This is not a cooking blog and I promise I won't post a thousand recipes. However, it IS a FOOD blog. From the ground up. Essentially, over time, I hope to touch on everything from our soil, to the food that comes from it, to ways in which to use that food! AND I love to cook, it's a big part of who I am. Sooo, from time to time I WILL share a recipe that is either one of my favorites and/or that showcases a great way to use some of our produce. This particular recipe does both! It makes for a delicious appetizer and would be a hit at any football party. AND it uses our cute miniature bell peppers!
Picture
Believe it or not, these peppers are not hot. They are sweet just like a bell pepper!
Recipe credit goes to my fantastic husband! He is the one that introduced me to these Cream Cheese Chicken Poppers! For a printer friendly version click here.

Before we start preparing these bad boys, you need to decide if you want to bake them in the oven or cook them on the grill. I highly recommend the grill but both ways are good and if you prefer the oven, now is a good time to preheat it to 375 degrees Fahrenheit.

Step one:

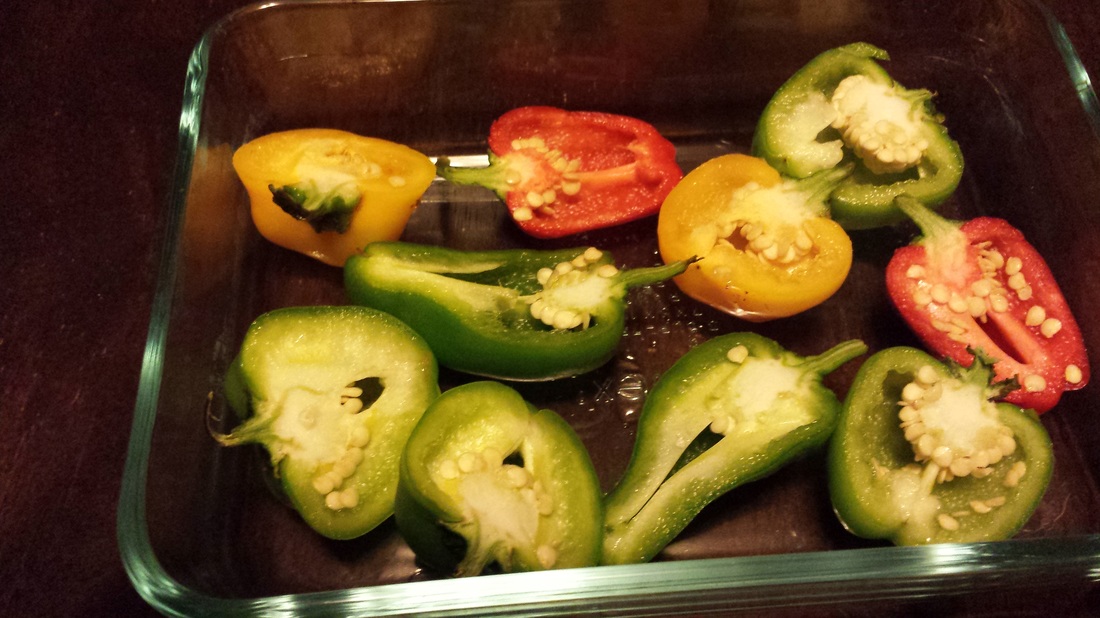
Wash the peppers and cut in half lengthwise leaving the stem intact. The reason we leave the stems intact is to keep the filling from pushing out as we proceed. Once you've cut the peppers, clean the seeds out of the middle. Don't get too hung up on this step. Remember, these are sweet peppers and the seeds aren't going to set your mouth on fire and so if you miss a few it's not a big deal! Once you've got this done, set the peppers aside.
Picture
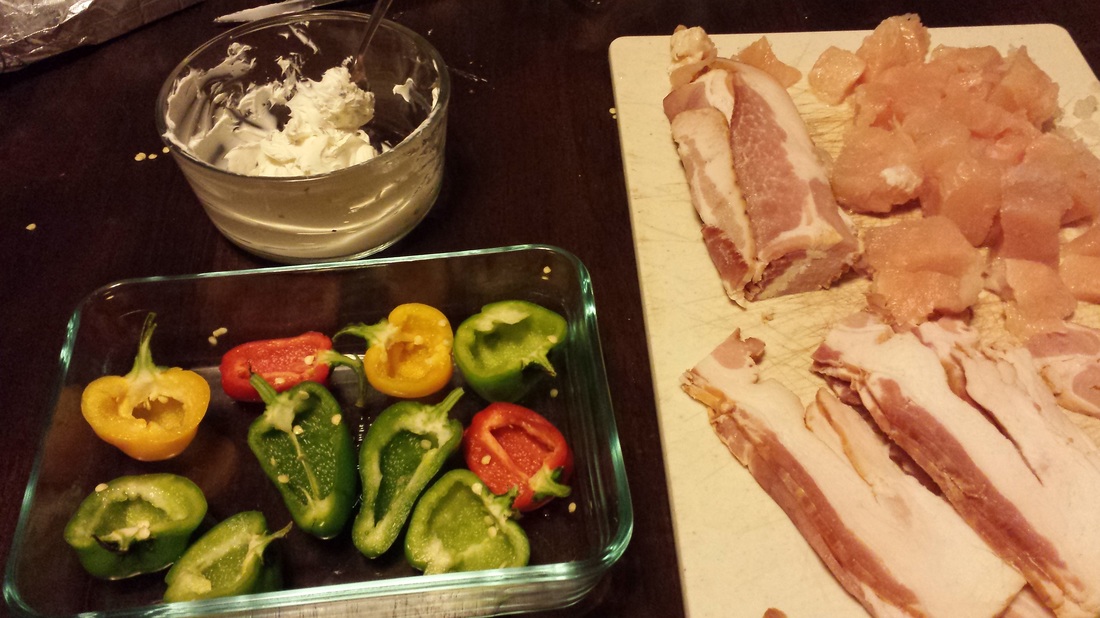
In this picture, I have not removed the seeds yet. To see what the peppers look like seeded please refer to the photo in step four where all of the ingredients are assembled in one photo.
Step two:

Mix 2 tsp of herbs into your cream cheese. The beauty of this recipe is that you can use any combination of herbs that you like! And you can use as much or as little of them as you like. Two teaspoons is a guideline to help you get started! We recommend garlic and chives because that is what we like but feel free to experiment! You're going to want to make more than one batch of these chicken poppers anyway ;)

Step three:

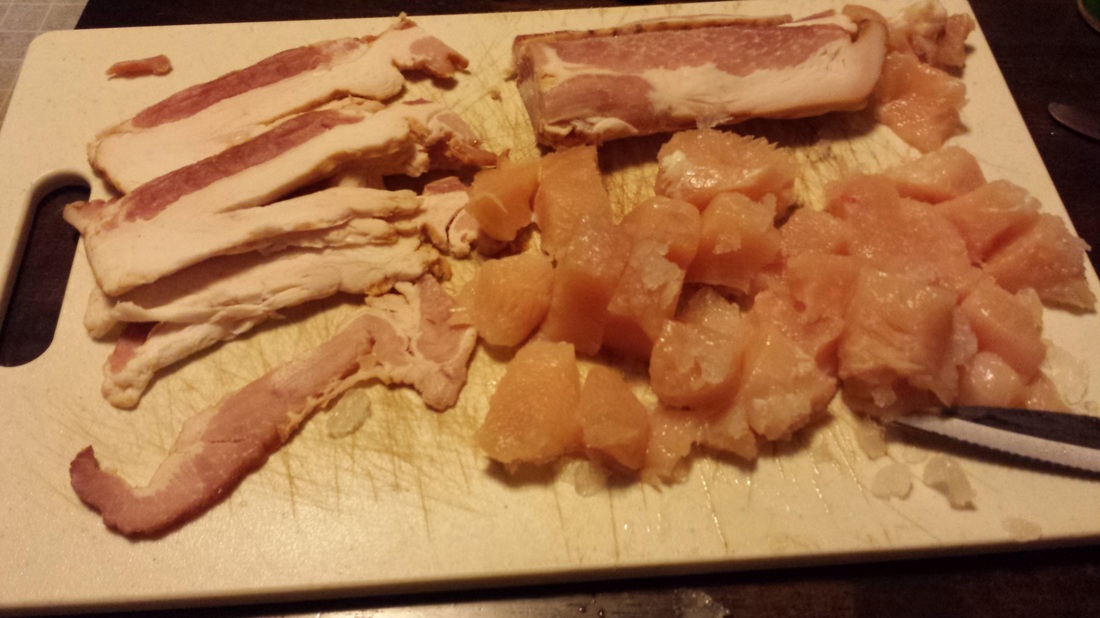
Cut a thawed chicken breast into small cubes. We are going to use the cubes to stuff the peppers so make sure they are small enough to fit inside these little guys! While you're working with raw meat, go ahead and cut your bacon strips in half and set them aside as well.
Picture
Friendly reminder - anytime you work with raw meat make sure to prevent cross contamination and check internal temperature of the finished cooked product. Here is a good reference with tips for handling raw meat and promoting food safety!

Step four:

​Once you have all of the components assembled,
Picture
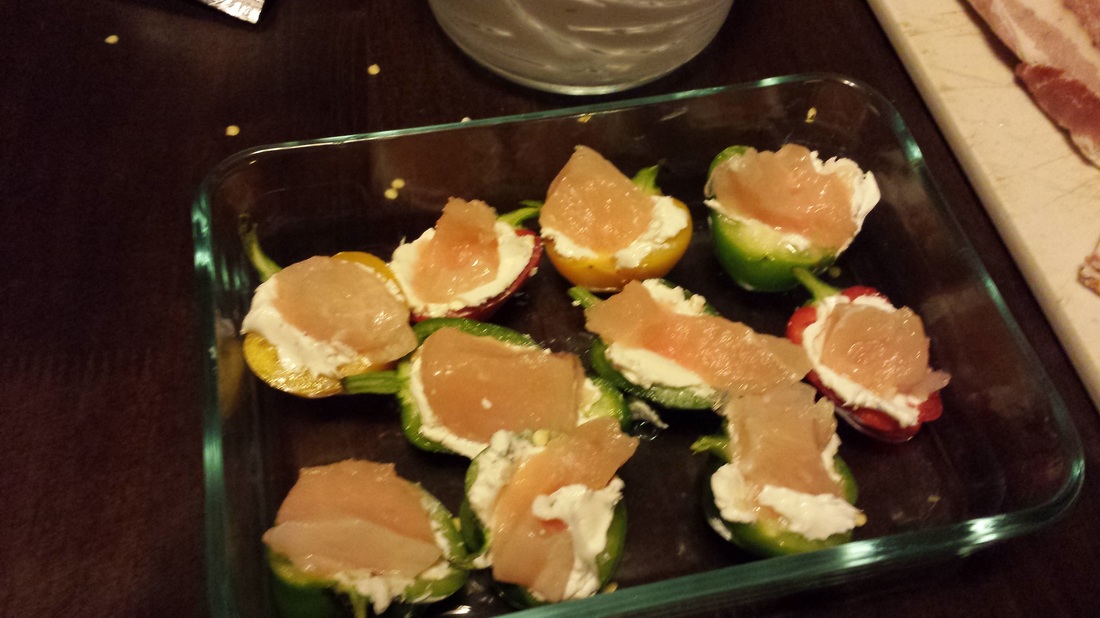
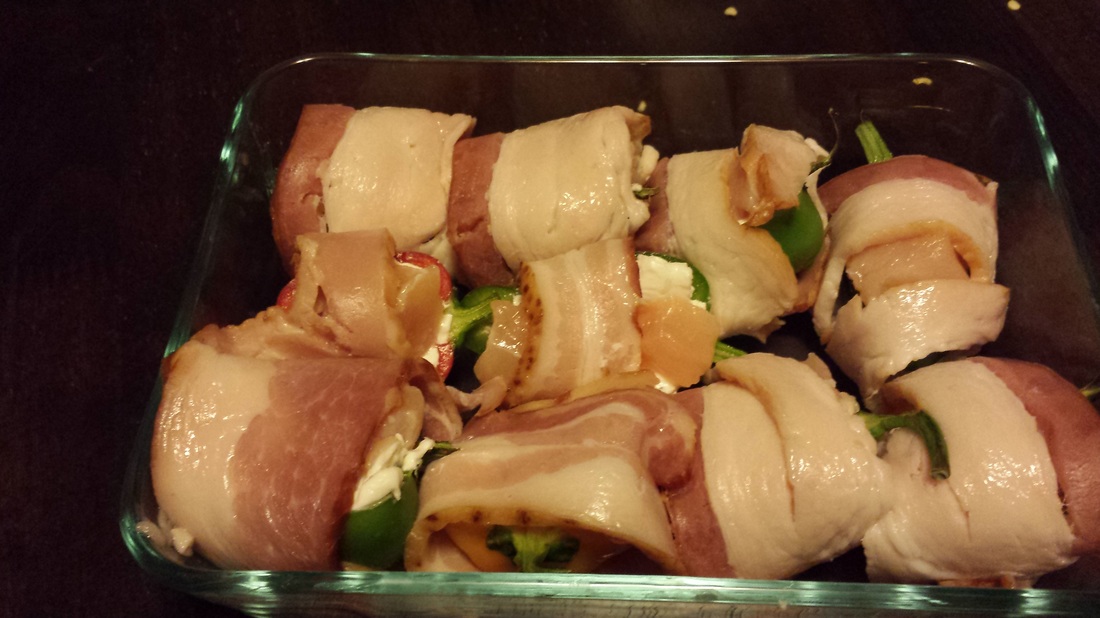
fill the peppers with cream cheese mixture and then place a cube of chicken into each pepper half. Once all of the peppers are filled, wrap each one with the bacon slices you prepared by cutting in half earlier.
Picture
Picture
Place a cube of chicken in each pepper. It's ok if the chicken sticks up out of the pepper!
Picture
All wrapped in bacon and ready to go in the oven (or grill)!
Step five:

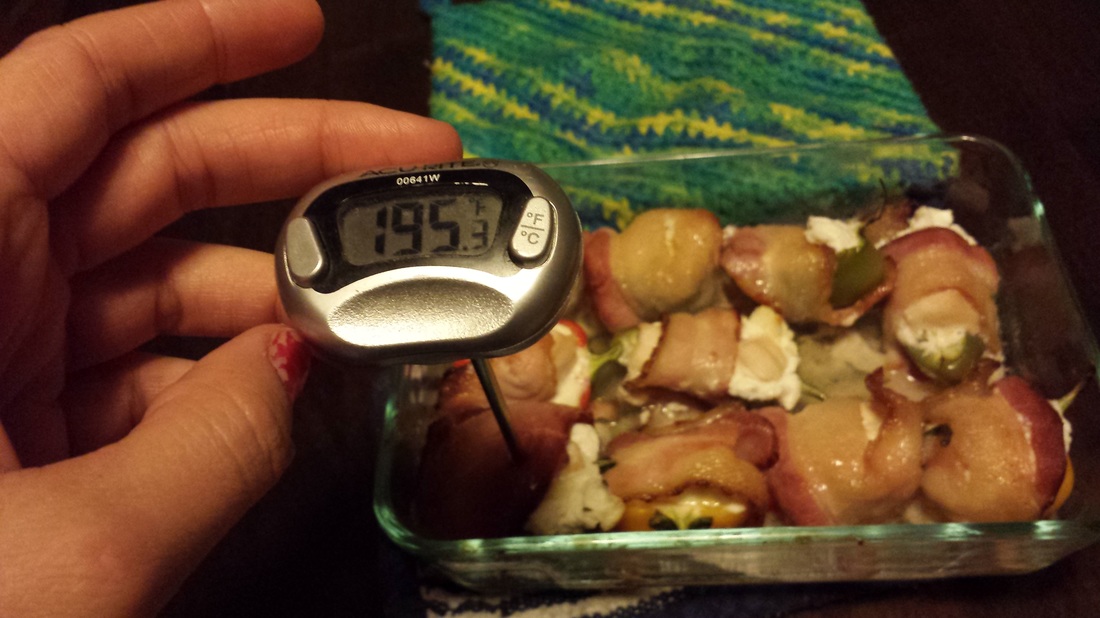
If you chose to bake these in the oven, place them in a baking dish and into your preheated oven and bake them for 30 minutes. It's always a good idea to take the internal temperature of a couple of them using a meat thermometer to verify that the chicken is done. Chicken should reach at least 165 degrees Fahrenheit. As you will see in the picture below, mine actually reached 195 degrees Fahrenheit.
Picture
Picture
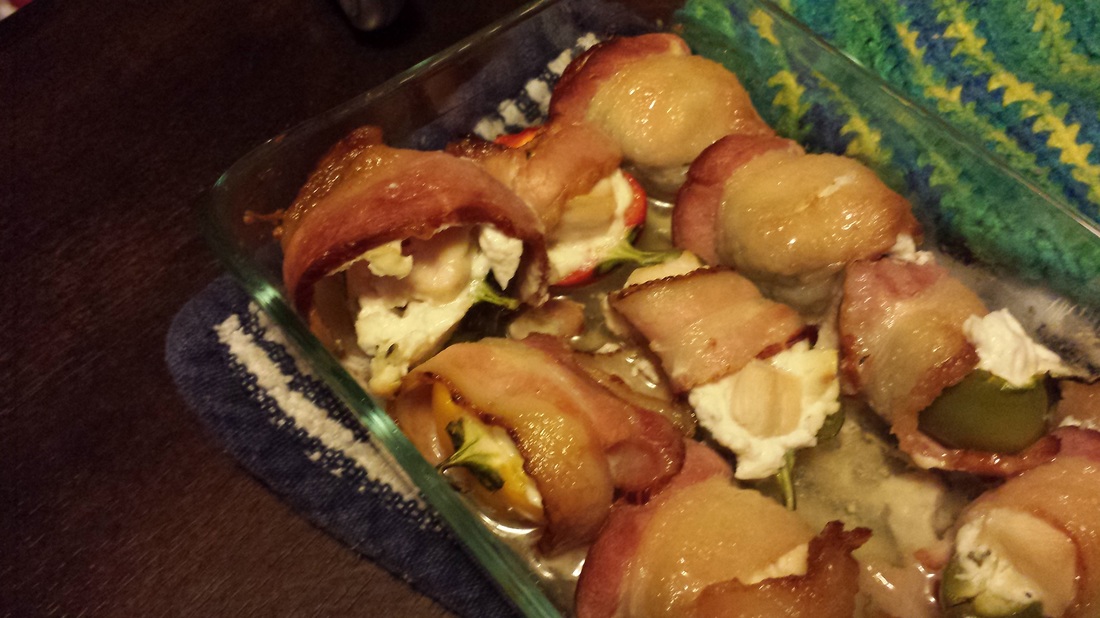
Finished product!! Mmmm mmmm good!!
Enjoy! Brun Ko Farm
0 Comments

    Emily Paulsen

    Just a woman with a passion for the animals, the land, and feeding people!

    Picture

    Archives

    April 2025
    February 2025
    January 2025
    December 2024
    November 2024
    July 2024
    April 2024
    March 2024
    January 2024
    December 2023
    October 2023
    August 2023
    July 2023
    May 2023
    April 2023
    March 2023
    February 2023
    October 2022
    September 2022
    August 2022
    March 2021
    January 2021
    December 2019
    June 2019
    April 2019
    January 2019
    August 2018
    June 2018
    May 2018
    April 2018
    February 2018
    January 2018
    December 2017
    November 2017
    October 2017
    March 2017
    February 2017
    January 2017
    December 2016
    November 2016
    October 2016
    September 2016
    July 2016
    June 2016
    May 2016
    April 2016
    March 2016
    February 2016
    January 2016
    December 2015
    November 2015
    October 2015
    September 2015

    Categories

    All
    Cows
    Farm Visits!
    General
    Meet Our Herd
    Recipes
    Who Are We Anyway?

    RSS Feed

Proudly powered by Weebly